> For the complete documentation index, see [llms.txt](https://zessai.gitbook.io/zessai-docs/llms.txt). Markdown versions of documentation pages are available by appending `.md` to page URLs; this page is available as [Markdown](https://zessai.gitbook.io/zessai-docs/getting-started/zess.ai-quick-start-guide-using-aster-dex-and-metamask.md).
# Zess.AI Quick Start Guide Using Aster DEX and MetaMask
{% stepper %}
{% step %}
### Activate Your Zess.AI Account
Before setting up MetaMask, Aster, or your AI Trader, you first need to **activate your Zess.ai account**.
Go to
In the **top-right corner**, click **Sign In**.
You will now see the Zess login page.

If you have not created your account yet, click **Sign Up**.

{% hint style="info" %}
**Sign In** is for users who already have a Zess account.
**Sign Up** is for creating your account using your **Activation Code** received in your email after completed payment.
{% endhint %}
#### Create Your Account
On the **Create Your Account** page, enter:
* **Email Address**
* **Password**
* **Confirm Password**
* **Activation Code**
Copy and paste the **Zess Activation Code** you received into the Activation Code field.
#### Create a Secure Password
Make sure your password meets all of the password-strength requirements shown on the screen.
Once all requirements are completed, click **Create Account**.
Your **Zess.ai account is now activated.**
You can now log in to Zess and continue with the next steps to connect MetaMask and Aster and get your first Zess AI Trader running.
**VIDEO TUTORIAL:**
{% embed url="" %}
### Before You Start — What You Will Need
There are **two different types of funds** you will need.
#### 1. ZESS.AI — AI Usage
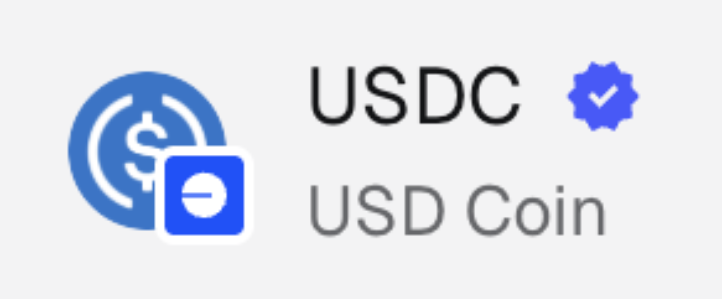
You need **USDC (Base Network)**.
This goes into your **Zess x402 Wallet**.
The USDC in your x402 Wallet is used to pay for the **AI analysis and requests made by your Zess AI Traders**.
**What to Look for in MetaMask**
Select:
**USDC — USD Coin**\
**Network: Base**
Look for the **blue USDC logo with the small blue Base network symbol**.
**Or**
{% hint style="warning" %}
Make sure you select **USDC on Base Network**, not USDC on another network.
{% endhint %}
For example, you could start with **$5 USDC (Base Network)**.
Zess Grid Traders use only a small amount of USDC for each AI analysis, so a small balance is enough to get started.
#### 2. ASTER DEX — Trading Capital
You need **USDT (BNB Chain)**.
This goes into your **Aster Perpetual Account**.
This is the actual money your AI Trader will use for trading.
**What to Look for in MetaMask**
Select:
**USDT — Tether USD**\
**Network: BNB Chain**
Look for the **green USDT logo with the small yellow BNB Chain symbol**.
**Or**
{% hint style="info" %}
#### Easy Way to Remember
**USDC = AI**
**USDC (Base Network) → Zess x402 Wallet → AI Costs**
**USDT = Trading**
**USDT (BNB Chain) → Aster Perpetual Account → Trading Capital**
You can buy both through **MetaMask**.
{% endhint %}
{% endstep %}
{% step %}
### Create Your MetaMask Wallet
Go to the official MetaMask website:
Click **Get MetaMask** and add the **MetaMask extension to your browser.**
Once MetaMask has been added to your browser, open the MetaMask extension and select **Create a New Wallet**.
Follow the instructions to create your wallet.
MetaMask will automatically create your first account.
Rename it:
**MetaMask Account 1 – Zess Trader 1**
{% hint style="danger" %}
Never share your:
* MetaMask recovery phrase
* Private keys
* Passwords
Your recovery phrase gives access to your wallet. Keep it private and secure.
{% endhint %}
{% endstep %}
{% step %}
### Buy USDC (Base Network) for Your Zess AI Usage
First, you need a small amount of USDC to pay for your Zess AI requests.
In MetaMask, buy **USDC (Base Network)**.
For example:
**$5 USDC (Base Network)**
When purchasing, make sure you select:
**Token: USDC**
**Network: Base**
{% hint style="warning" %}
Do not accidentally buy USDC on another network for this step.
Your Zess x402 Wallet requires **USDC (Base Network)**.
{% endhint %}
{% endstep %}
{% step %}
### Send USDC (Base Network) to Your Zess x402 Wallet
Go to Zess:
Click your **Profile icon**.
Switch to **Beginner Mode**.
Find your **Zess x402 Wallet** and copy the wallet address.
Now return to MetaMask.
Select **USDC (Base Network)** and click **Send**.
Paste your **Zess x402 Wallet Address** and enter the amount you want to send.
For example:
**$5 USDC**
Before sending, check:
* ✓ Token = **USDC**
* ✓ Network = **Base**
* ✓ Address = **Your Zess x402 Wallet Address**
Then approve the transaction.
Once complete, your Zess x402 Wallet should show your USDC balance.
This USDC pays for your **AI usage in Zess.**
{% hint style="info" %}
**USDC (Base Network) → Zess x402 Wallet → AI Usage**
{% endhint %}
**VIDEO TUTORIAL 1:**
{% embed url="" %}
**VIDEO TUTORIAL 2:**
{% embed url="" %}
{% endstep %}
{% step %}
### Get USDT (BNB Chain) for Trading
Now you need trading capital for your AI Trader.
For example:
**$100 USDT (BNB Chain)**
There are **two ways** you can fund your Aster trading account.
{% tabs %}
{% tab title="Option 1 — Buy USDT in MetaMask" %}
In MetaMask, make sure you are using:
**MetaMask Account 1 – Zess Trader 1**
Buy **USDT (BNB Chain)**.
When purchasing, make sure you select:
**Token: USDT**
**Network: BNB Chain**
This USDT will become the trading capital for **Zess Trader 1**.
In the next step, you will deposit this USDT from MetaMask into your **Aster Perpetual Account**.
{% endtab %}
{% tab title="Option 2 — Transfer USDT Directly to Aster" %}
If you already have **USDT (BNB Chain)** in another wallet or exchange, you can also transfer your USDT directly using the deposit address and instructions provided by Aster.
This can save you from first transferring the USDT to MetaMask and then making another transaction into Aster.
When making a direct transfer, always carefully check the **deposit address and network shown by Aster** before sending your funds.
**IMPORTANT**
For this setup:
**USDT = Trading Capital**
**BNB Chain = Aster**
Always make sure you are sending **USDT using the BNB Chain network** and carefully verify all deposit information before confirming the transfer.
{% endtab %}
{% endtabs %}
{% endstep %}
{% step %}
### Connect Account 1 – Zess Trader 1 to Aster
Go to:
Click **Connect Wallet**.
Select **MetaMask**.
Make sure MetaMask is using:
**MetaMask Account 1 – Zess Trader 1**
Approve the connection.
Before continuing, check that the wallet address shown in Aster matches the wallet address for:
**MetaMask Account 1 – Zess Trader 1**
{% endstep %}
{% step %}
### Deposit Your USDT (BNB Chain) Into Aster
Now move your trading capital from MetaMask into your Aster Perpetual Account.
In Aster, click **Deposit**.
Select **Perpetual Account**.
Then select:
**Network: BNB Chain**
**Token: USDT**
Enter the amount you want to deposit.
For example:
**100 USDT**
Approve the transaction in MetaMask.
Wait for the transaction to complete.
Then check that your trading balance appears in Aster.
#### Before You Approve
Check:
* ✓ MetaMask Account = **MetaMask Account 1 – Zess Trader 1**
* ✓ Aster Account = **Perpetual Account**
* ✓ Network = **BNB Chain**
* ✓ Token = **USDT**
* ✓ Amount = Correct
Your trading money now follows this path:
**USDT (BNB Chain) → MetaMask → Aster Perpetual Account → Trading Capital**
{% endstep %}
{% step %}
### Create Your Aster API
Now you need to connect this Aster account to Zess.
While **MetaMask Account 1 – Zess Trader 1** is connected to Aster, go to **MORE – API Management**:
Click **Authorize New API Wallet**.
Follow the instructions to create your API credentials.
Save the required API information securely.
{% hint style="warning" %}
Before creating the API, make sure **MetaMask Account 1 – Zess Trader 1** is the account currently connected to Aster.
This API will belong to **Zess Trader 1**.
{% endhint %}
{% endstep %}
{% step %}
### Connect Aster to Zess
Go back to:
Go to **Config → Exchange Keys**.
Add a new exchange connection.
Select **Aster DEX**.
Enter the Aster API information you just created.
Save the Configuration.
**VIDEO TUTORIAL:**
{% embed url="" %}
{% endstep %}
{% step %}
### Set Up Your AI Model
Now that Aster is connected to Zess, the next step is to choose the **AI model** that will power your AI Trader.
Go to **Config → Model Config**:
Open your **MODEL\_CONFIG**.

Under **Choose AI Model**, select **GLM-5**.
We currently recommend **GLM-5** because it has a very low cost per AI analysis, making it a good choice for an AI Trader that continuously monitors and analyzes the market.
Your Zess x402 Wallet should already contain **USDC (Base Network)**.
This USDC is used to pay for your AI analysis.
Once **GLM-5** is selected, click **Start Trading**.
{% hint style="warning" %}
Do not simply close the window after selecting GLM-5.
You must click **Start Trading** to save and activate your AI model.
{% endhint %}
Your AI model is now configured and ready if you can see it says glm-5 on your Config page under AI Models.
**VIDEO TUTORIAL:**
{% embed url="" %}
{% endstep %}
{% step %}
### Choose Your First Strategy From the Strategy Market
Now you're ready to choose the strategy your first AI Trader will use.
Go to **Market** in the Zess menu:
Here you will see the ready-made strategies currently available in the **Zess Strategy Market**.
For your first AI Trader, choose either:
* **Solana AI Grid**
* **HYPE AI Grid**
Find the strategy you want to use and click **Copy Strategy**.
This copies the strategy into your own Zess Strategies page.
You do **not** need to build your own strategy to get started.
**VIDEO TUTORIAL:**
{% embed url="" %}
{% endstep %}
{% step %}
### Set Up Your Grid Strategy
After clicking **Copy Strategy**, Zess will take you to your **Strategies** page:
On the left-hand side, find the strategy you just copied.
For example:
* **Solana AI Grid (Copy)**
* **HYPE AI Grid (Copy)**
Select the copied strategy.
You can rename the strategy to make it easier to identify.
For example:
* **Solana AI Grid – Trader 1**
* **HYPE AI Grid – Trader 1**
#### Set Your Investment Amount
For your first setup, you can leave the strategy settings at their recommended/default values.
The main setting you may want to change is **Investment Amount (USDT)**.

This determines how much trading capital you want to allocate to this strategy.
For example:
* **$50**
* **$100**
* **$500**
* **$1,000**
Choose an amount that is appropriate for your account and available trading capital.
Once everything is set, click the green **Save** button.
Your strategy is now ready to use.
{% endstep %}
{% step %}
### Create Your First AI Trader
Now we're going to bring everything together:
**Your Aster Account + GLM-5 + Your Grid Strategy**
Go to **Config**:
Click **Create Trader**.
Enter a name for your trader.
For example:
**Zess Trader 1**
Next, select the Aster account you connected earlier.
Select **Aster**.
Make sure you select the Aster connection associated with:
**MetaMask Account 1 – Zess Trader 1**
Then go to **Select Trading Strategy**.
Choose the strategy you just copied and saved.
For example:
* **Solana AI Grid – Trader 1**
* **HYPE AI Grid – Trader 1**
Make sure the correct strategy appears as the selected strategy before continuing.

{% endstep %}
{% step %}
### Configure Your AI Trader
Continue down the **Create Trader** page.
You will see some additional settings for your AI Trader.
#### Margin Settings
You can leave the recommended/default margin settings unless you specifically need to change them.
#### Leaderboard
Choose whether you want your AI Trader to appear on the Zess Leaderboard.
Select **Show** if you want your trader displayed.
Select **Hide** if you want to keep your trader private.
#### AI Scan Decision Interval
This determines how often your AI Trader analyzes the market and decides whether any action is required.
For the **Solana AI Grid** or **HYPE AI Grid**, you can use:
**20 Minutes**
This means your AI Agent will analyze the market approximately every 20 minutes.
Remember:
Every AI analysis uses a small amount of USDC from your Zess x402 Wallet.
More frequent analysis means more AI calls and therefore higher AI usage costs.
Once everything is configured, click **Create Trader**.
Your AI Trader has now been created!
{% endstep %}
{% step %}
### Start Your AI Trader
After creating your trader, it will appear under **Current Traders**:
Find **Zess Trader 1**.
Then click **START**.
{% hint style="warning" %}
Creating your AI Trader does **not** automatically start it.
You must click **START** for your AI Trader to begin analyzing the market and operating your strategy.
{% endhint %}
Once started, your AI Trader is officially up and running and instead of Start it will say Stop.
{% endstep %}
{% step %}
### Check Your Dashboard
Now let's make sure your AI Trader is operating correctly.
Go to **Dashboard**:
Find **Zess Trader 1**.
If you're using the **Solana AI Grid** or **HYPE AI Grid**, check that the Grid has been placed correctly.
You should see **Buy and Sell levels above and below the current market price**.
This is an easy way to confirm that your Grid Trader has started and is operating.
{% endstep %}
{% endstepper %}
## Congratulations — Your First Zess AI Trader Is Now Running!
You have now:
* ✓ Created your MetaMask wallet
* ✓ Funded your Zess x402 Wallet with **USDC (Base Network)**
* ✓ Funded your trading account with **USDT (BNB Chain)**
* ✓ Connected MetaMask to Aster
* ✓ Deposited your trading capital into Aster
* ✓ Created your Aster API
* ✓ Connected Aster to Zess
* ✓ Configured **GLM-5**
* ✓ Copied **Solana AI Grid or HYPE AI Grid**
* ✓ Set your investment amount
* ✓ Created your first AI Trader
* ✓ Clicked **START**
* ✓ Checked your trader on the Dashboard
Your first **Zess AI Trader is now set up and running.**
## Want to Add More Zess AI Traders?
Once your first AI Trader is running, you can add more traders using **additional accounts inside the same MetaMask wallet**.
To keep everything organized, use the **same number throughout the setup**:
**MetaMask Account 1 → Aster API 1 → Zess Trader 1**
**MetaMask Account 2 → Aster API 2 → Zess Trader 2**
**MetaMask Account 3 → Aster API 3 → Zess Trader 3**
{% stepper %}
{% step %}
#### Create a new MetaMask account and name it:
**Account 2 – Zess Trader 2**
**Account 3 – Zess Trader 3** etc.
{% endstep %}
{% step %}
#### Fund it with **USDT (BNB Chain)**.
{% endstep %}
{% step %}
#### Connect the account to **Aster** and deposit your trading capital.
{% endstep %}
{% step %}
#### Create a new **Aster API** and connect it to Zess.
{% endstep %}
{% step %}
#### Create your new Zess AI Trader, choose your strategy, and click **START**.
{% endstep %}
{% endstepper %}
{% hint style="warning" %}
Each Zess AI Trader should have its **own dedicated MetaMask/Aster account**.
{% endhint %}
## Need Help or Troubleshooting?
If you run into any issues while setting up your Zess AI Trader, please check out our **Zess Tutorials and Troubleshooting Guides**:
[Zess.AI Tutorials & Documentation](https://zessai.gitbook.io/zessai-docs?utm%5Fsource=chatgpt.com)
If you still need help, please contact us through our [**Telegram support channels**](https://t.me/zessai_community) and our team will be happy to assist you.